


1. Introduction
In this tutorial we are going to build a spring boot application that will upload a file to AWS S3 bucket using the Apache Camel Enterprise Integration Patterns(EIP) framework. Apache Camel is an open-source integration framework based on known Enterprise Integration Patterns.
2. Create camel-s3-fileupload project using Spring Boot.
Spring Boot is a framework to build a spring based applications VERY VERY quickly, you can bootstrap a spring based application within a matter of minutes, if not seconds, using Spring Boot Framework. Spring Boot is the most popular Framework for Building Microservices and REST APIs.
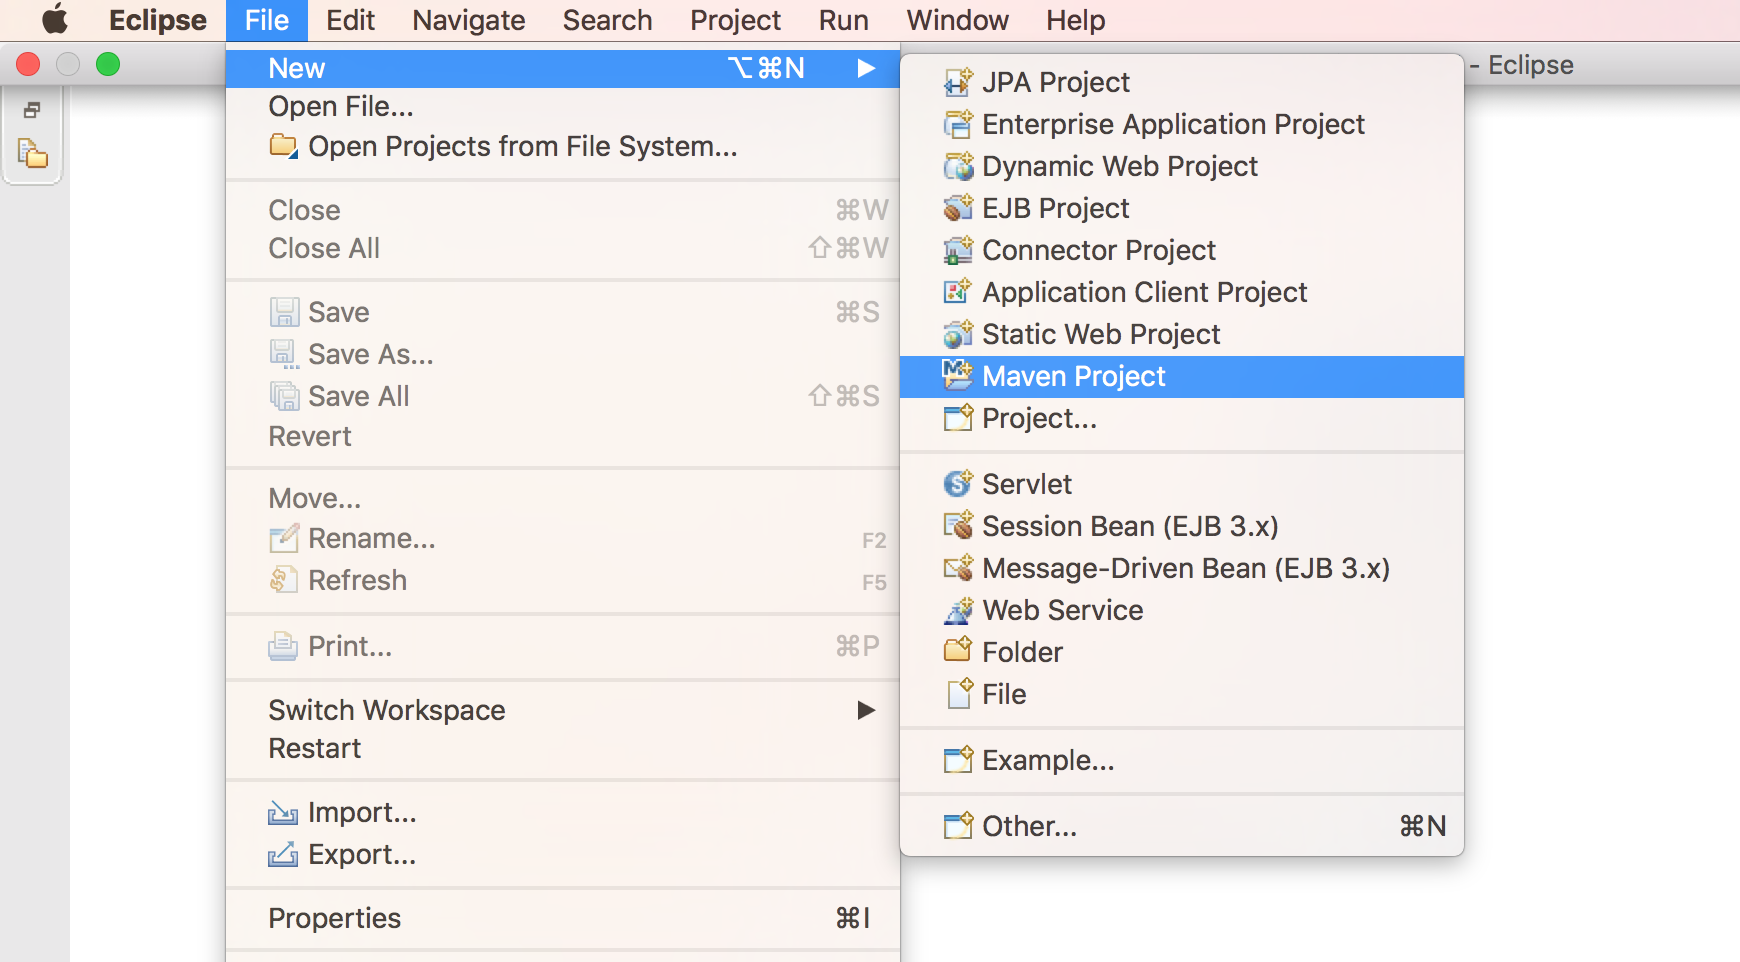
1. First we will create a Maven Project from eclipse. For now we will create simple plain Maven Project. We will spring-bootify it by adding the spring-boot-starter parent project to the pom.xml.
File > New > Maven Project.
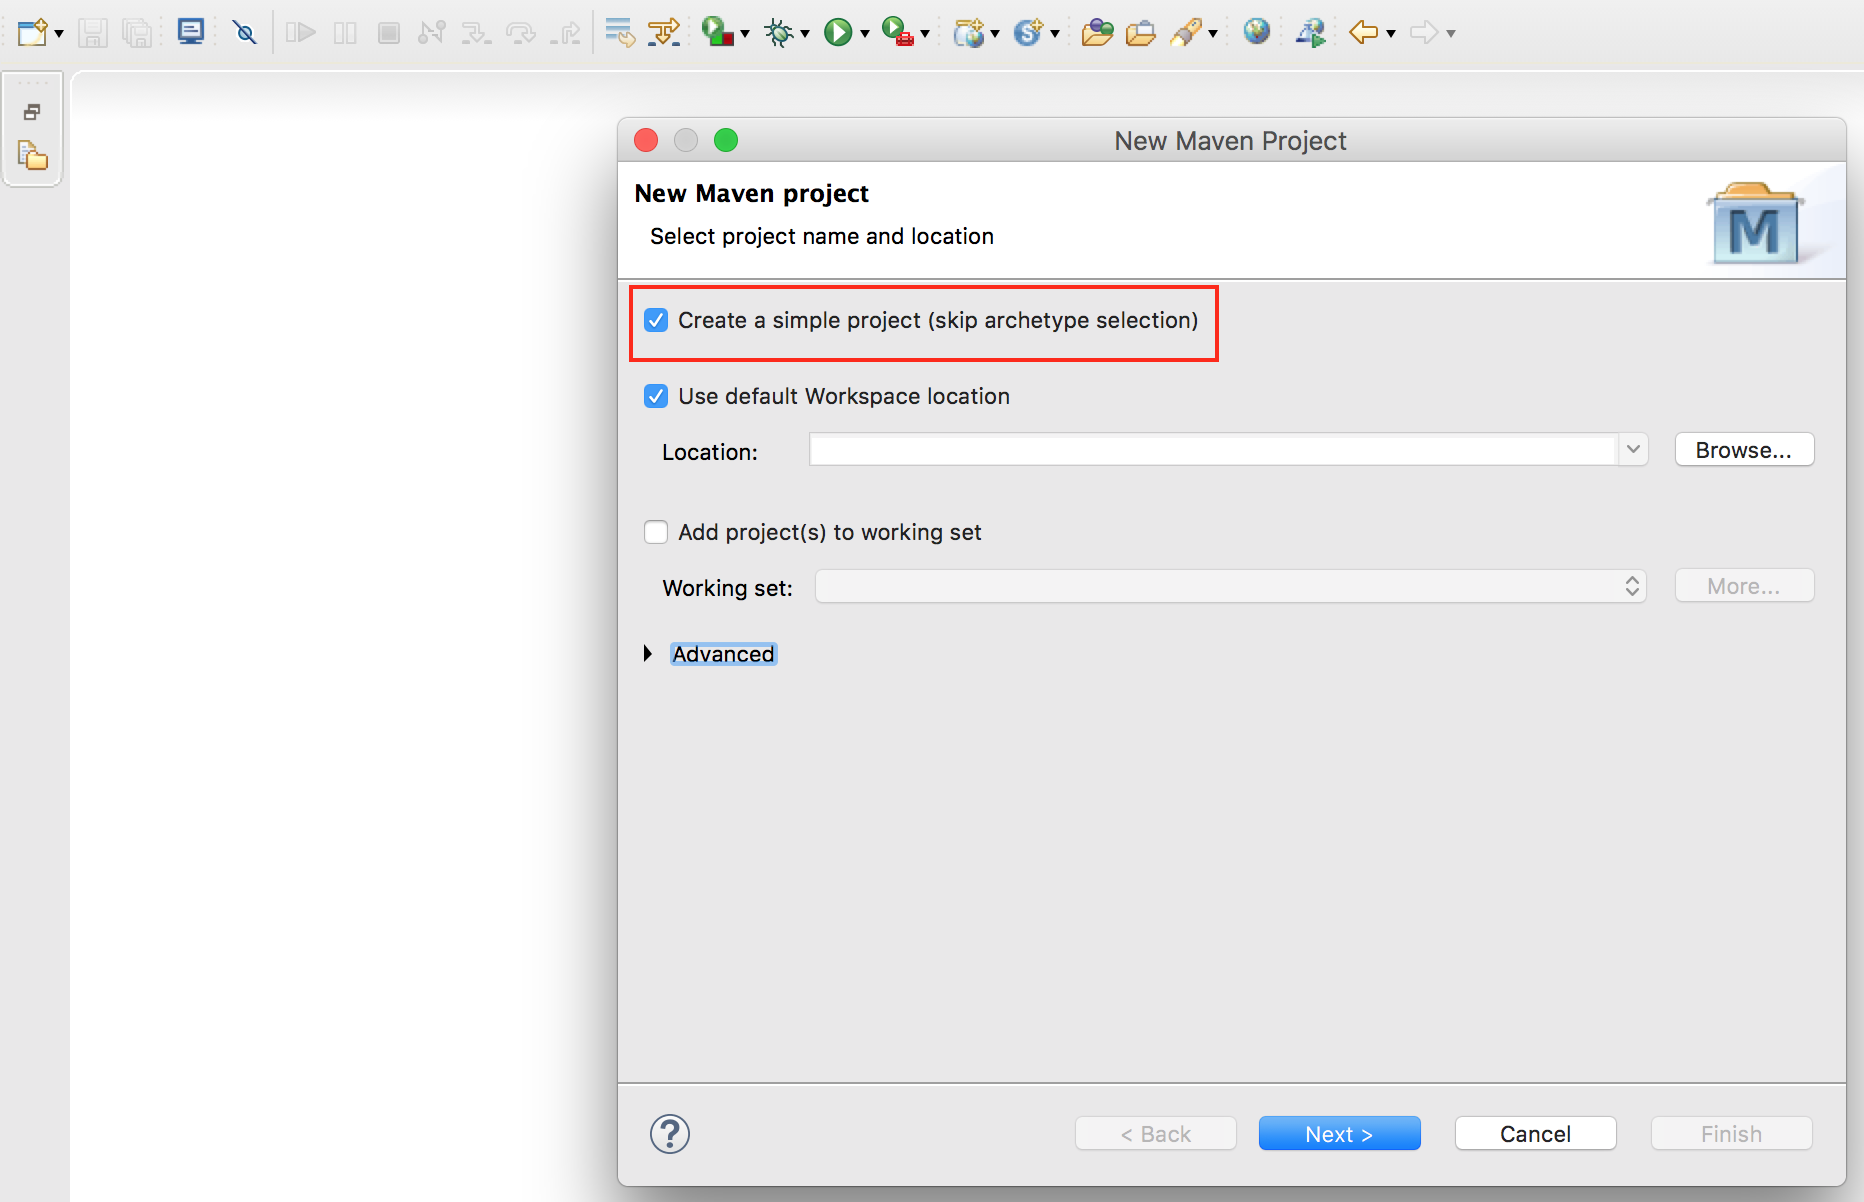
 2. Skip the archetype selection(we just need to create a simple maven project) and Click
 Next
 3. Enter Group Id, Artifact Id…etc and click
 Finish
 4. We have created a Maven Project. Now, let’s make it a Spring Boot project and we do that by adding this parent project to the
 pom.xml.
<parent>
	<groupId>org.springframework.boot</groupId>
	<artifactId>spring-boot-starter-parent</artifactId>
	<version>2.1.1.RELEASE</version>
</parent>
That is it, our app is now a Spring Boot Application. Adding this spring-boot-starter-parent project to the pom.xml is all we need to make our project a spring-boot project.
Next, we are going to add all the dependencies that our project needs. For instance, since our application is RESTful application, we need to add those Restful related dependencies. But, what dependencies our project needs to make it Restful? well, all we need is adding this below dependency to our pom.xml. This starter dependency downloads all dependencies needed for building web, including RESTful, applications using Spring MVC. Uses Tomcat as the default embedded container. The other two dependencies are for apache camel and the aws-java-sdk-s3 dependencies.
	<dependency>
		<groupId>org.springframework.boot</groupId>
		<artifactId>spring-boot-starter-web</artifactId>
	</dependency>
    <dependency>
		<groupId>org.apache.camel</groupId>
		<artifactId>camel-spring-boot-starter</artifactId>
		<version>2.17.0</version>
	</dependency>

	<dependency>
		<groupId>org.apache.camel</groupId>
		<artifactId>camel-aws</artifactId>
		<version>2.17.0</version>
	</dependency>
	<dependency>
		<groupId>com.amazonaws</groupId>
		<artifactId>aws-java-sdk-s3</artifactId>
		<version>1.11.475</version>
	</dependency>
Behind the scenes, this spring-boot-starter-web dependency will add all these dependencies listed here pom.xml to our project.
You can verify if these jars are included to your application by running mvn dependency:tree from the command line(in the root directory of your project) or you can just expand Maven Dependencies folder from your eclipse.
5. Since our app is a standalone, we need to have a class with the main method because any java standalone application needs to have one class with the main method to be used as an entry point of the application.
If you have used SPRING INITIALIZR to create your spring boot application this class will be created for you.
But, for now, let’s create the class CamelFileUploadApplication.java and replace the content with this.
package com.javakia.api.camel.s3.fileupload;

import org.springframework.boot.SpringApplication;
import org.springframework.boot.autoconfigure.SpringBootApplication;

/**
 * Main class for camel-s3-fileupload application. This class will be used as an
 * entry point to the application.
 *
 * @SpringBootApplication annotation is same as
 *                        (@Configuration, @EnableAutoConfiguration,
 *                        and @ComponentScan) all together
 *
 * @author Ahmedin Hassen
 *
 */
@SpringBootApplication
public class CamelFileUploadApplication {
	public static void main(String[] args) {
		SpringApplication.run(CamelFileUploadApplication.class, args);
	}

}
Next, let’s create the camel route, this route will upload a file from the from endpoint defined in the application.properties to AWS S3 bucket(this bucket name must also be defined in the application.properties file).
Create a class AWSS3Route.java and replace the content with this.
package com.javakia.api.camel.s3.fileupload;
import org.apache.camel.builder.RouteBuilder;
import org.apache.camel.component.aws.s3.S3Constants;
import org.springframework.stereotype.Component;
/**
* A simple Camel route that moves an object from an endpoint to AWS S3 Bucket
* Spring boot provides auto-configuration for Apache Camel and the camel route
* will be started automatically.
* The required dependencies are provided in the pom.xml file
* <p/>
*
* @Component annotation will make spring boot/camel auto detect this route when
* starting.
*/
@Component
public class AWSS3Route extends RouteBuilder {
@Override
public void configure() throws Exception {
from("{{from.component}}:{{from.endpoint}}").routeId("camelS3Route")
.setHeader(S3Constants.CONTENT_LENGTH, simple("${in.header.CamelFileLength}"))
//This is the filename on the S3 bucket
.setHeader(S3Constants.KEY, simple("${in.header.CamelFileNameOnly}"))
//aws-s3 the camel component and and that is how you tell camel where you want to upload.
.to("aws-s3://{{awsS3BucketName}}?deleteAfterWrite=false®ion={{awsRegion}}&accessKey={{awsAccessKey}}&secretKey=RAW({{awsAccessSecretKey}})")
//optionally logging success message
.log("${in.header.CamelFileNameOnly} succesfully uploaded to S3 {{awsS3BucketName}} bucket");
}
}
If you see from the route we are getting certain values from a configuration file like[accessKey, bucketName, region..etc]
So lets create the configuration file application.properties inside src/main/resources and add this content to the file. And make sure your replaced with correct values in the file.
    # the name of CamelContext name
    camel.springboot.name = camel-s3-fileUploader
    #component allows to communicate with other system like(file, http, tcp, jms, etc...). A camel compoent is a factory of endpoints
    from.component=[component name]
    #from.component=file
    #endpoint is the channel that you receive/send messages like directory name for file component, url for http components etc.
    from.endpoint=[your endpoint]
    #from.endpoint=/Users/ame/camel-s3
    awsS3BucketName = [your bucket name]
    #awsS3BucketName = amazon-forest
    awsRegion=[your aws region]
    #awsRegion=us-east-1
    awsAccessKey=[your aws access key]
    awsAccessSecretKey=[your aws access secret key]
That is it. We are done.
Lets Run the app and test.
From the terminal run mvn spring-boot:run(from the root directory of the project).
Or you can run the project from eclipse itself… Right Click–>Run As ->Java Application
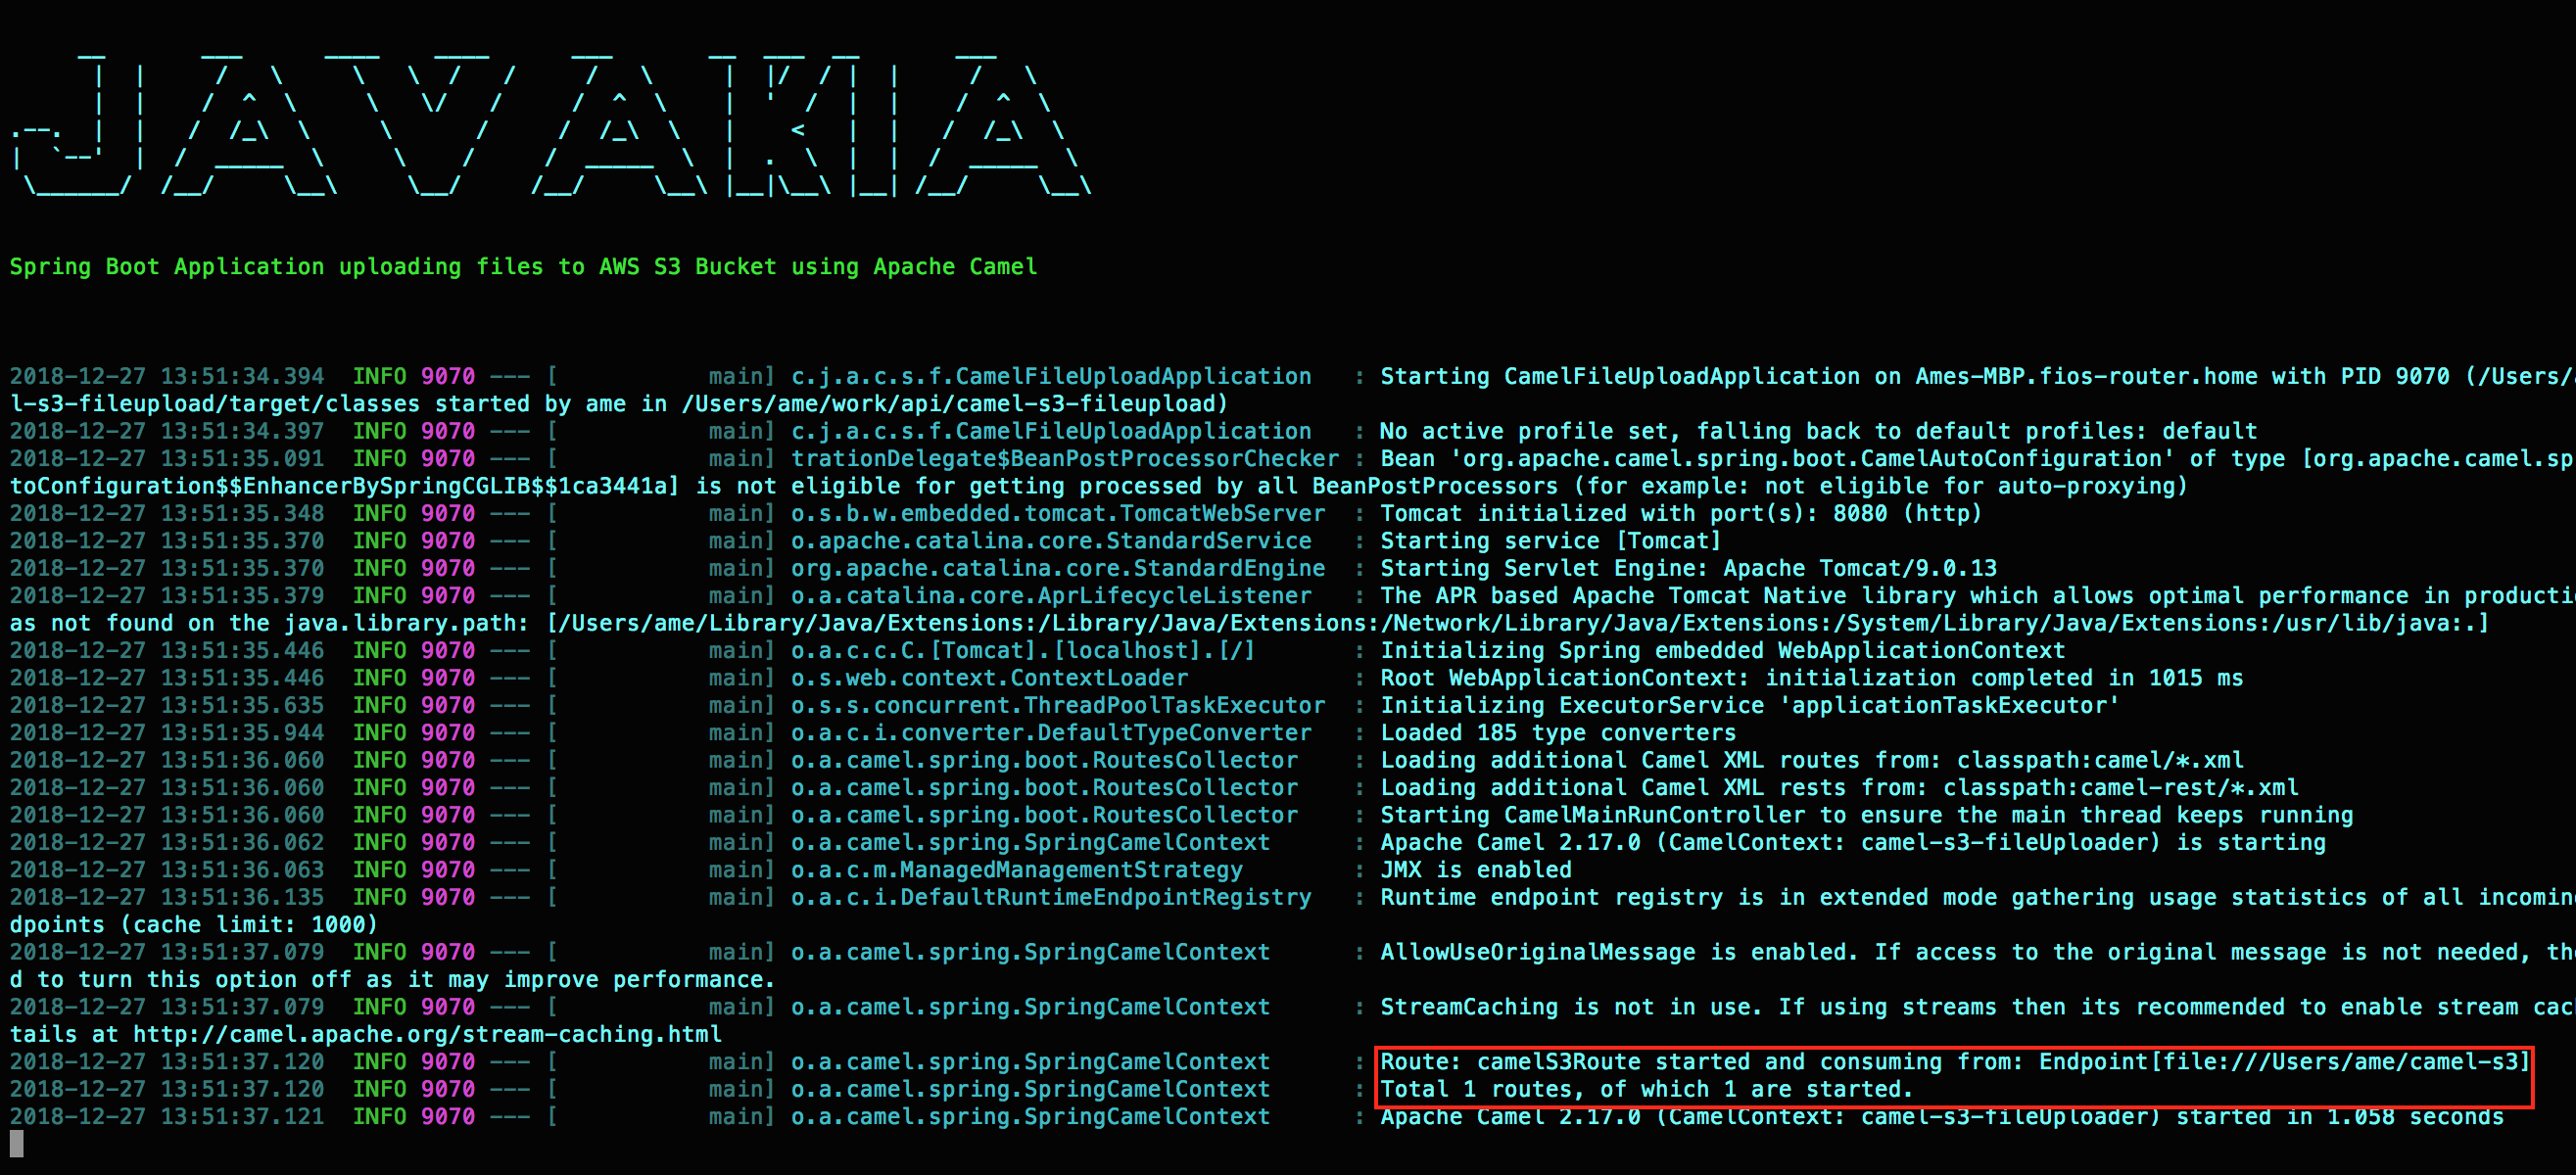
Did you notice that 1 camel route started and consuming from a directory?. In the application.properties I specified the from endpoint as /Users/ame/camel-s3, so as soon as camel sees any file in this directory it will upload it to the AWS S3.
So lets copy a file to the from directory.
echo "Hello there, Camel is awesome" > /Users/ame/camel-s3/camel-s3-test.txt
And the camel log shows the file camel-s3-test.txt is successfully uploaded to amazon-forest(this is my S3 bucket name defined in the application.properties)

Now, lets login to the AWS S3 Console and verify if the file is uploaded.
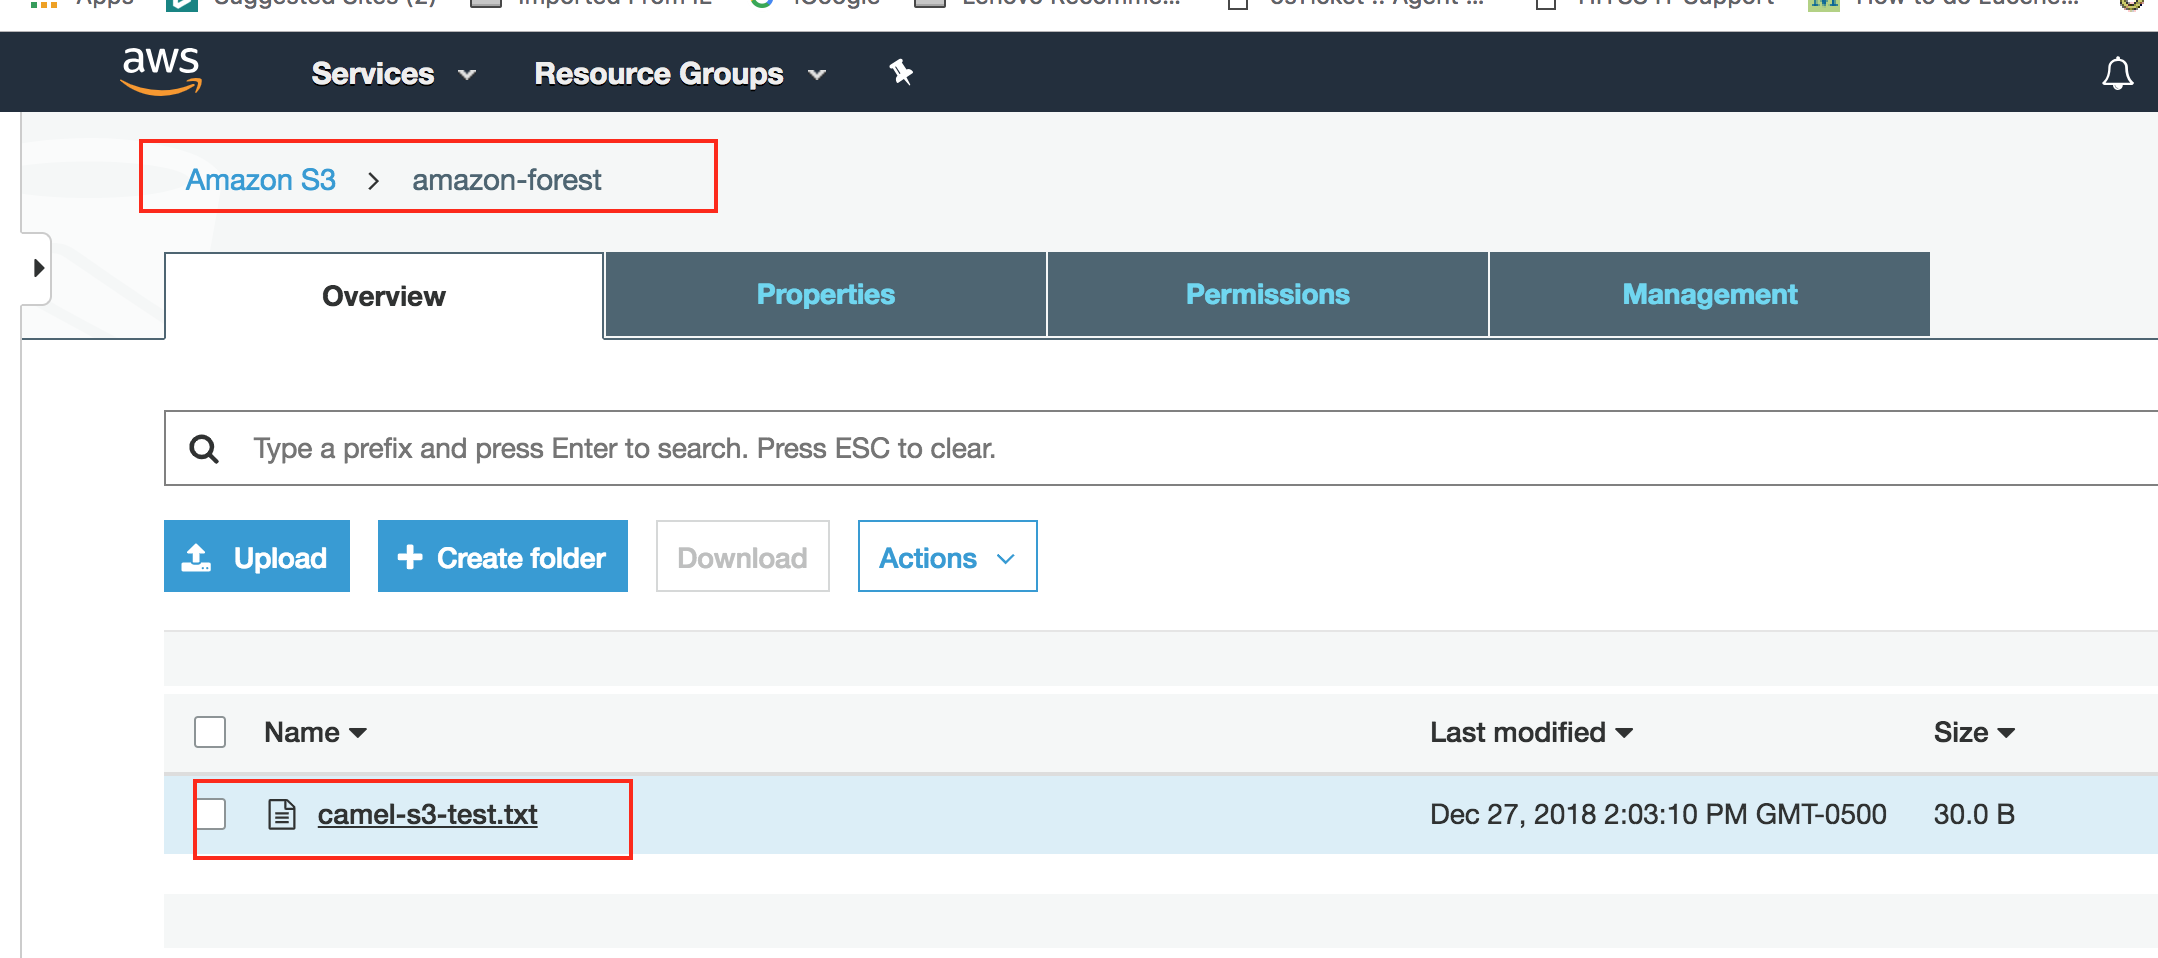 Great! the file indeed is uploaded to S3 bucket.
You can find the full source code on Github here
Or you can clone the code and run it by running these commands:
    git clone https://github.com/aahassen/camel-s3-fileupload.git
    cd camel-s3-fileupload
    mvn spring-boot:run
I hope this tutorial was helpful for you. Have questions or suggestions? Feel free to write a comment below. Thank you for reading!
Twitter
Google+
Facebook
Reddit
LinkedIn
StumbleUpon
Pinterest
Email