


In this tutorial, we are going to build a MicroService that will send SMS messages using Spring Boot and Twilio(Twilio provide API to send SMS programatically).
First create an account with Twilio
Create a Twilio account from Twilio.com. Twilio is a paid service but when you create an account the first time, they give you a free balance of $10 and you can send 100s of SMS messages with this free balance, so you will not have to pay them for testing/learning purpose. I have used their Java and Python client to send SMS programmatically. Its very simple. All you need is a few lines of code.
Once you create the account, you need to create a project.
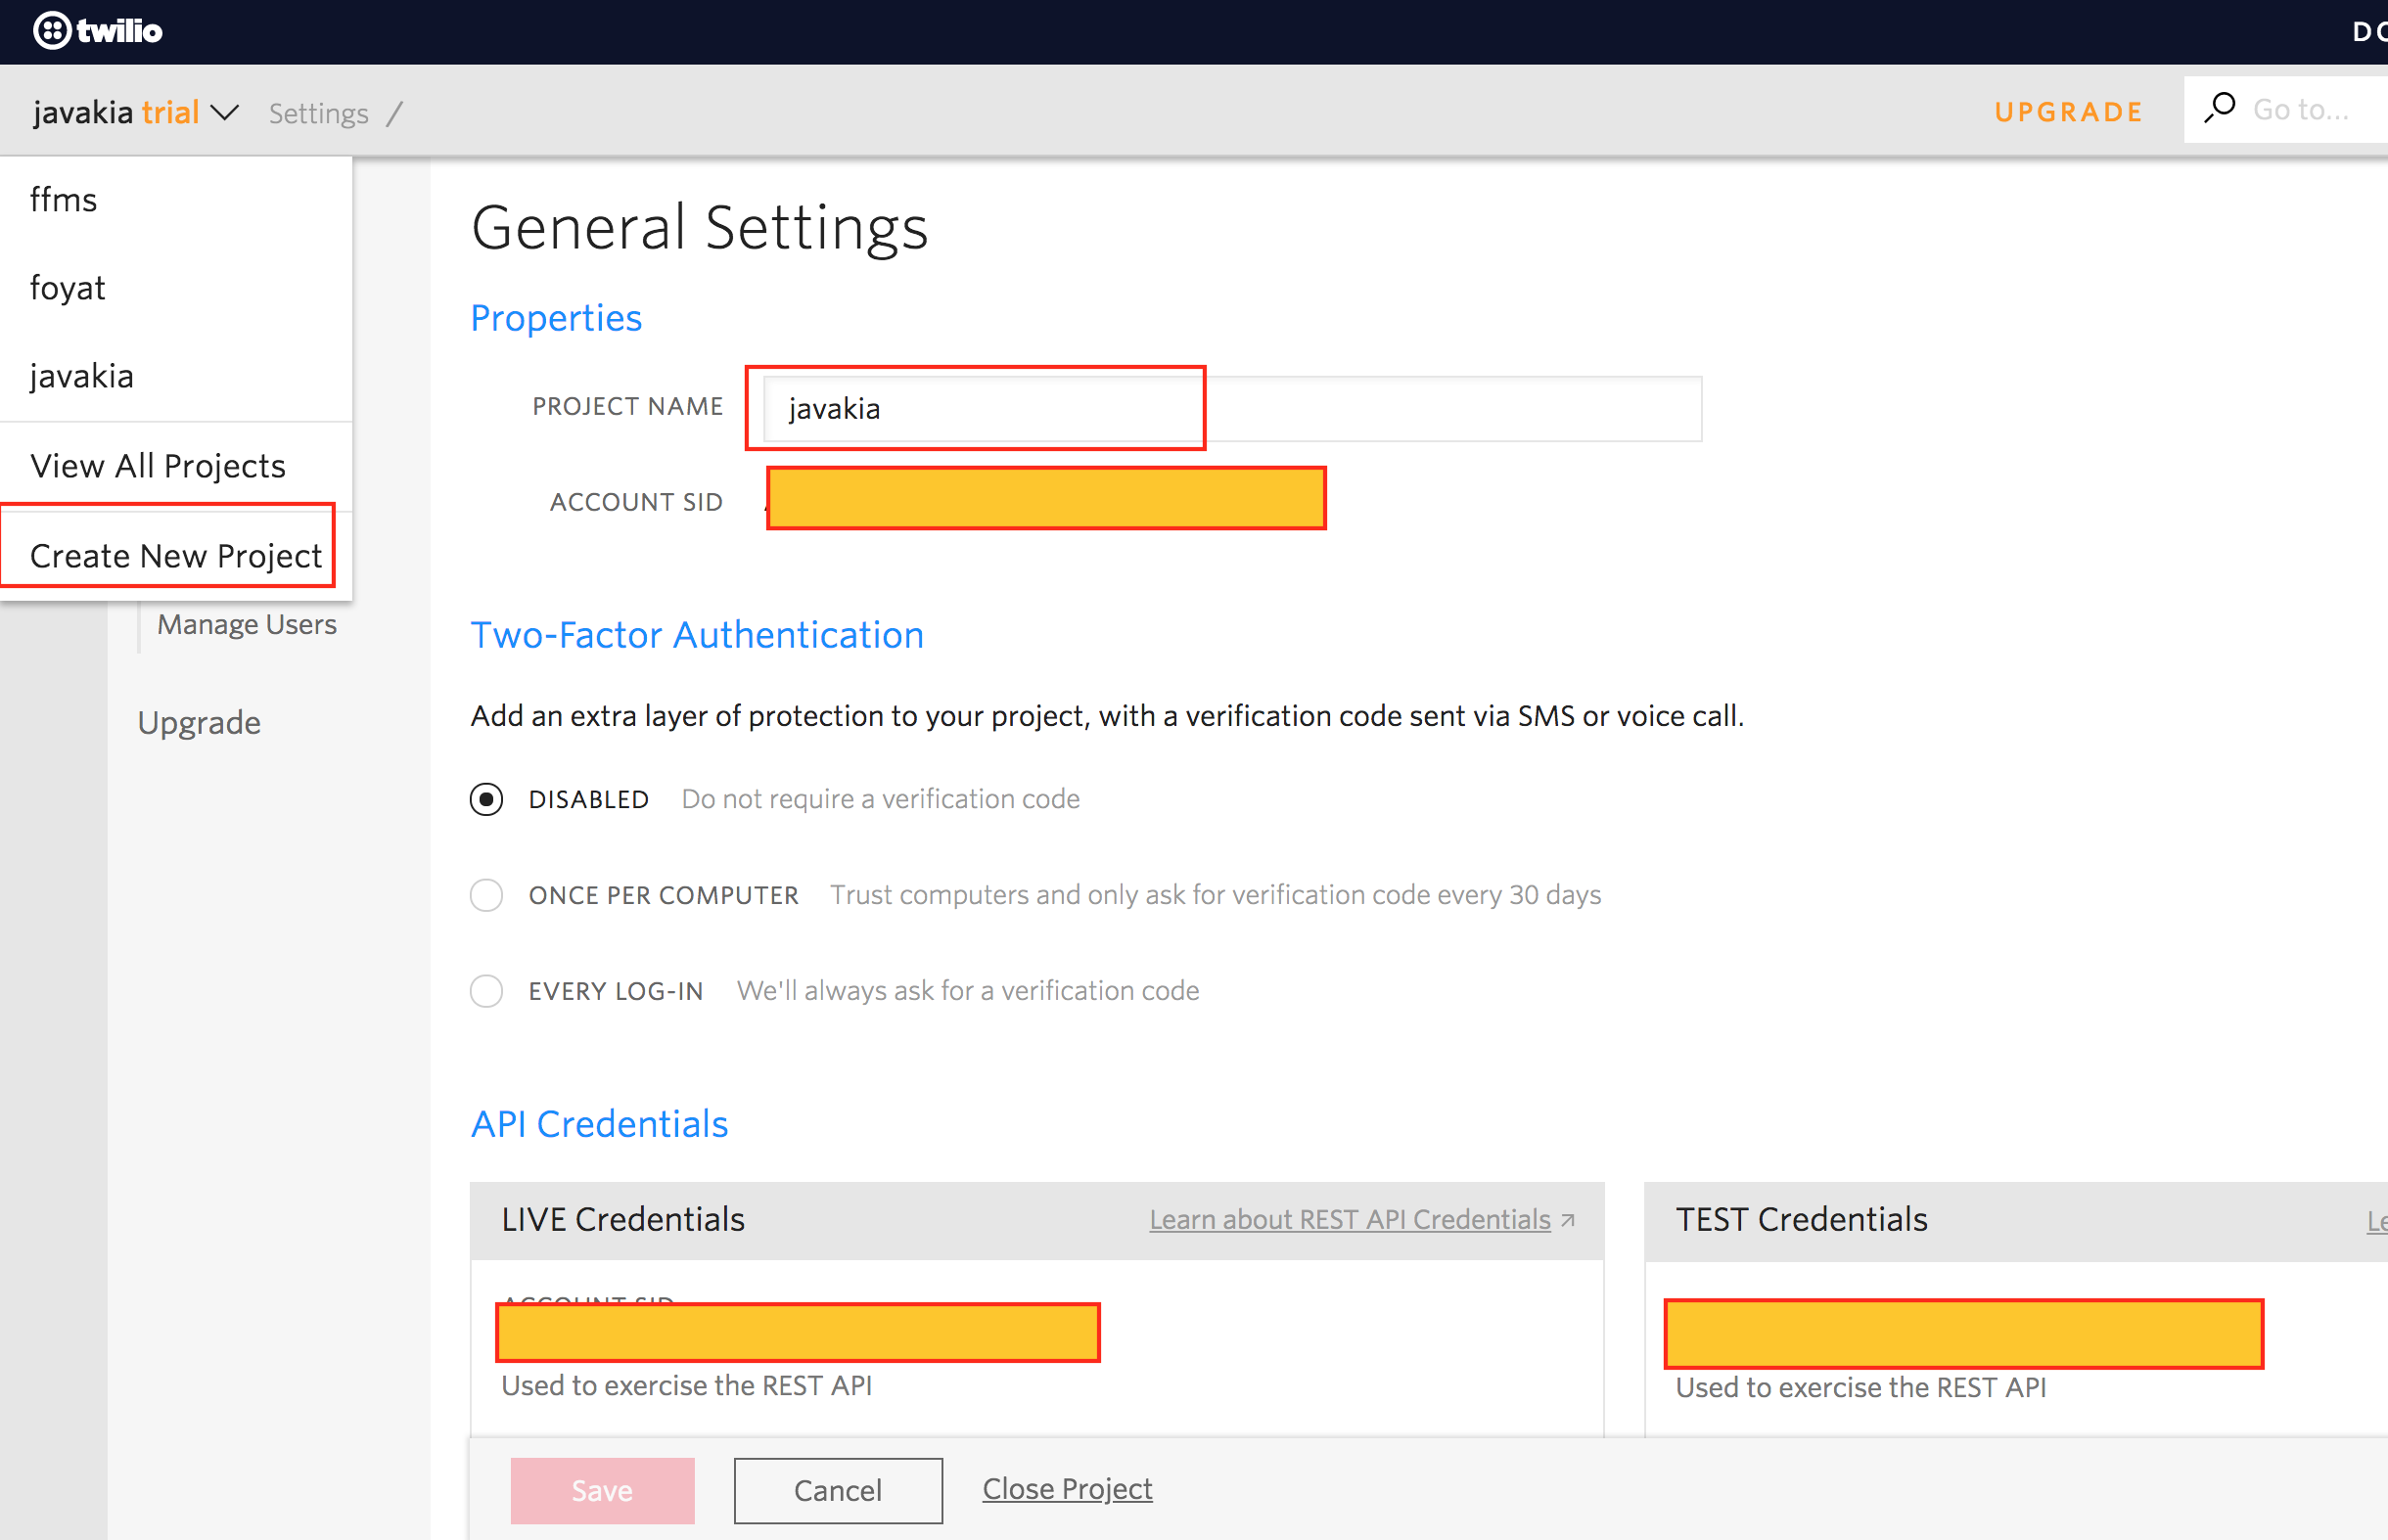
Note down your ACCOUNT SID and AUTH TOKEN and make sure that you have selected Programmable SMS option.
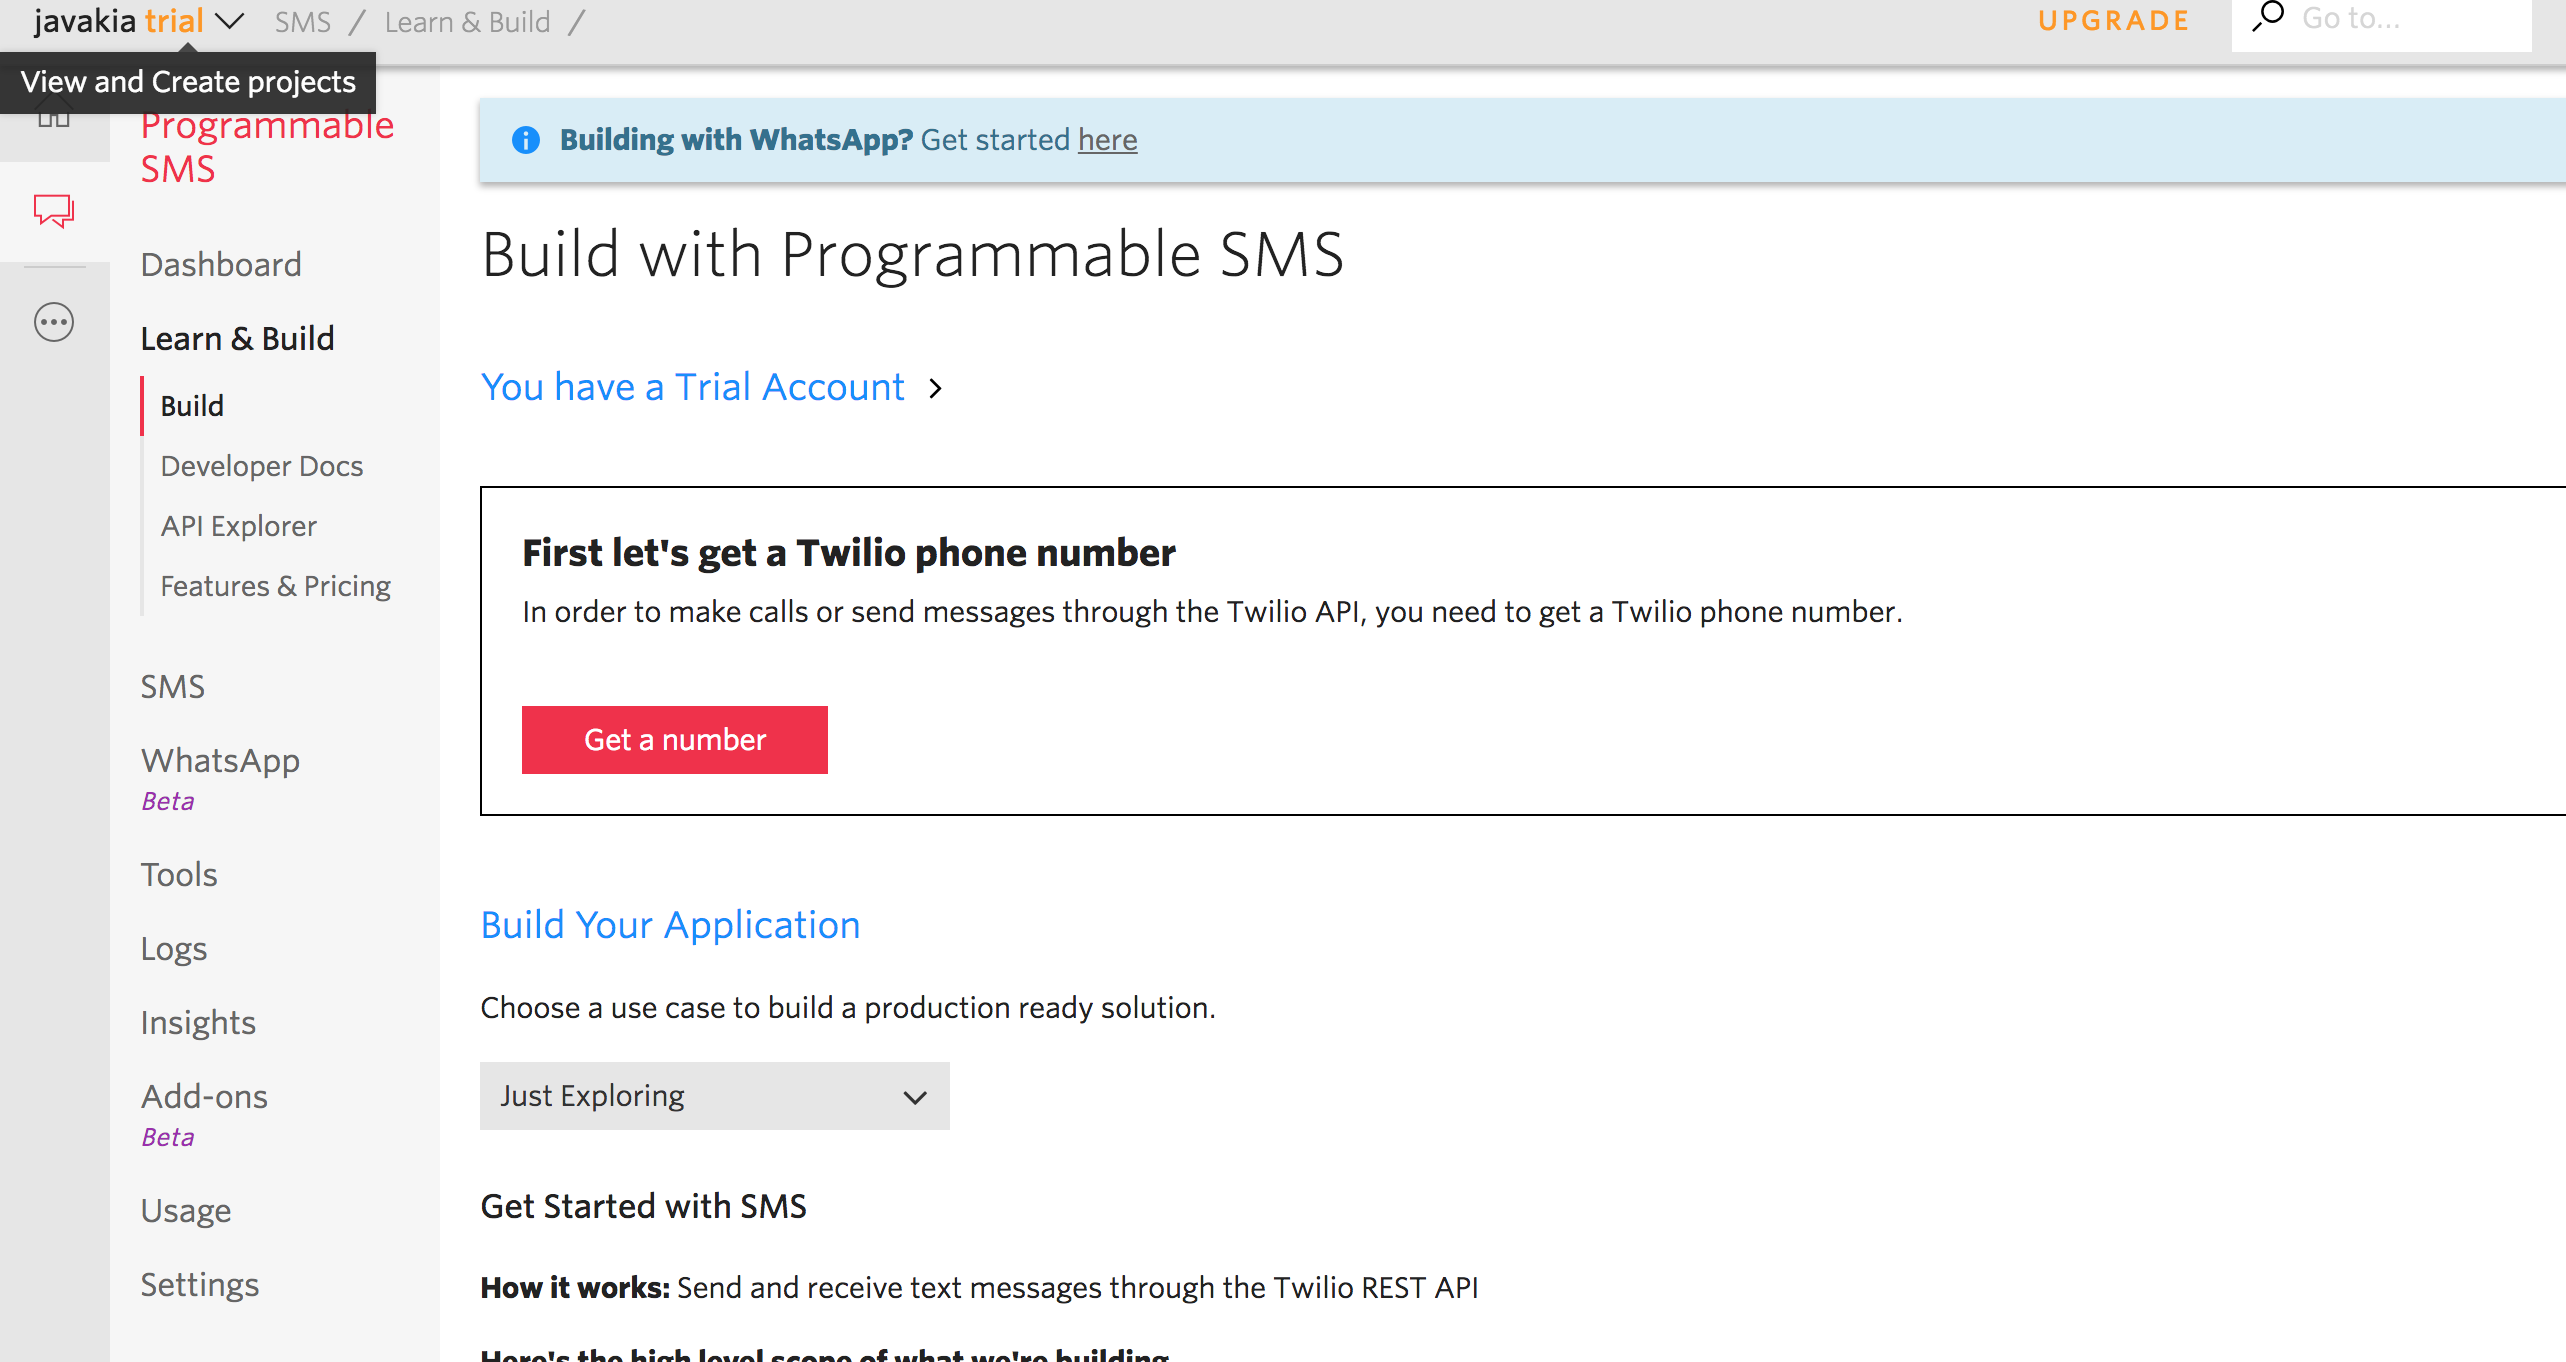
 You need to get a twilio phone number by clicking on
 Get Started then Get a Number button.
Alight, Our Twilio account is ready, let’s build our Microservice.
Building our Microservice using the Spring Boot.
Spring Boot is a framework to build a spring based applications VERY VERY quickly, you can bootstrap a spring based application within a matter of minutes, if not seconds, using Spring Boot Framework. Spring Boot is the most popular Framework for Building Microservices and REST APIs.
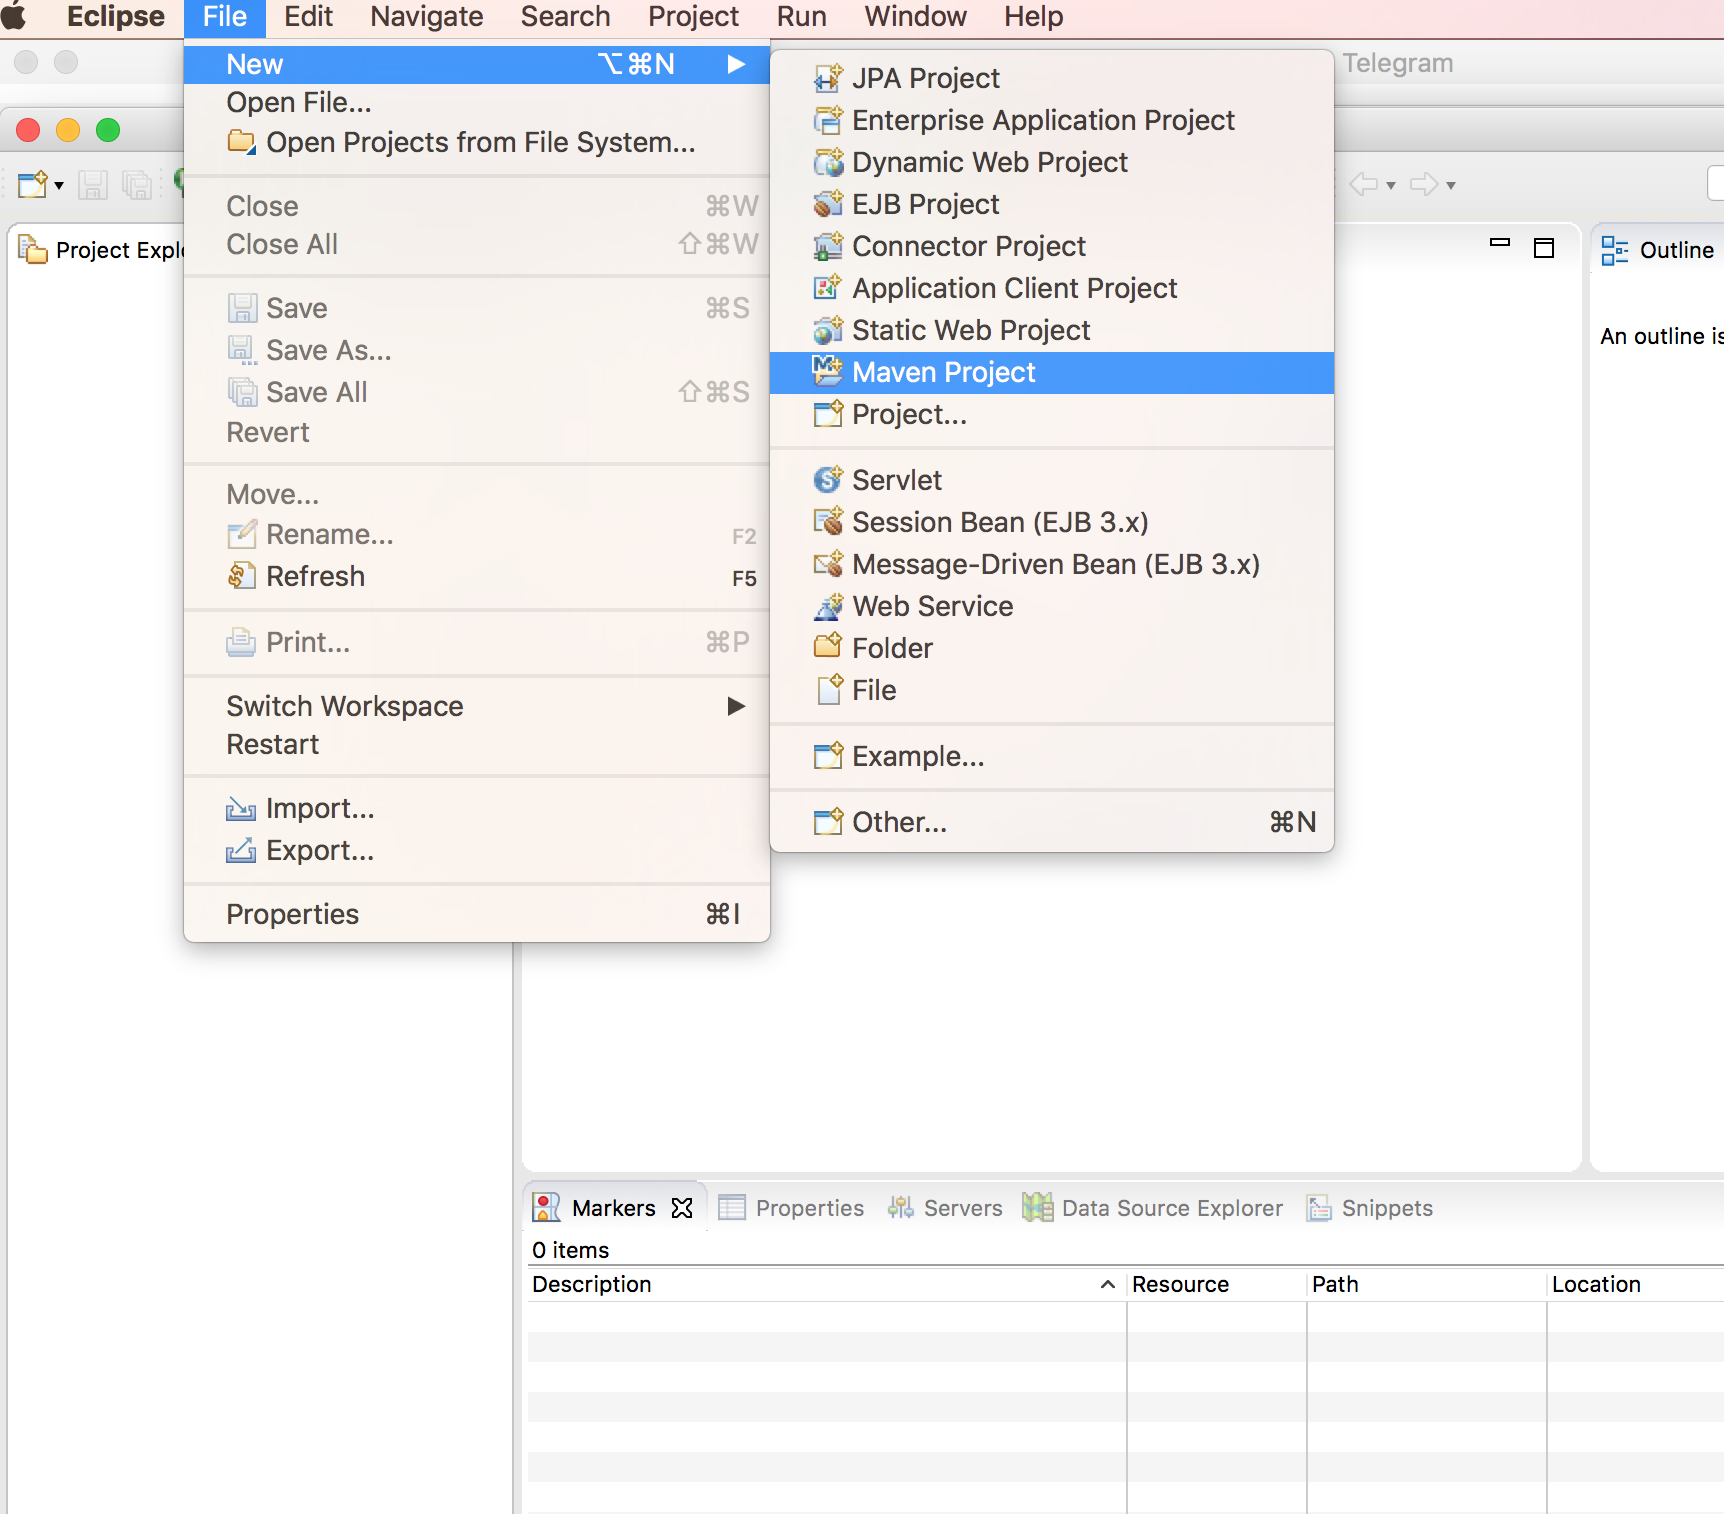
1. First we will create a Maven Project from eclipse. For now we will create simple plain Maven Project. We will spring-bootify it by updating the pom.xml file.
File > New > Maven Project.
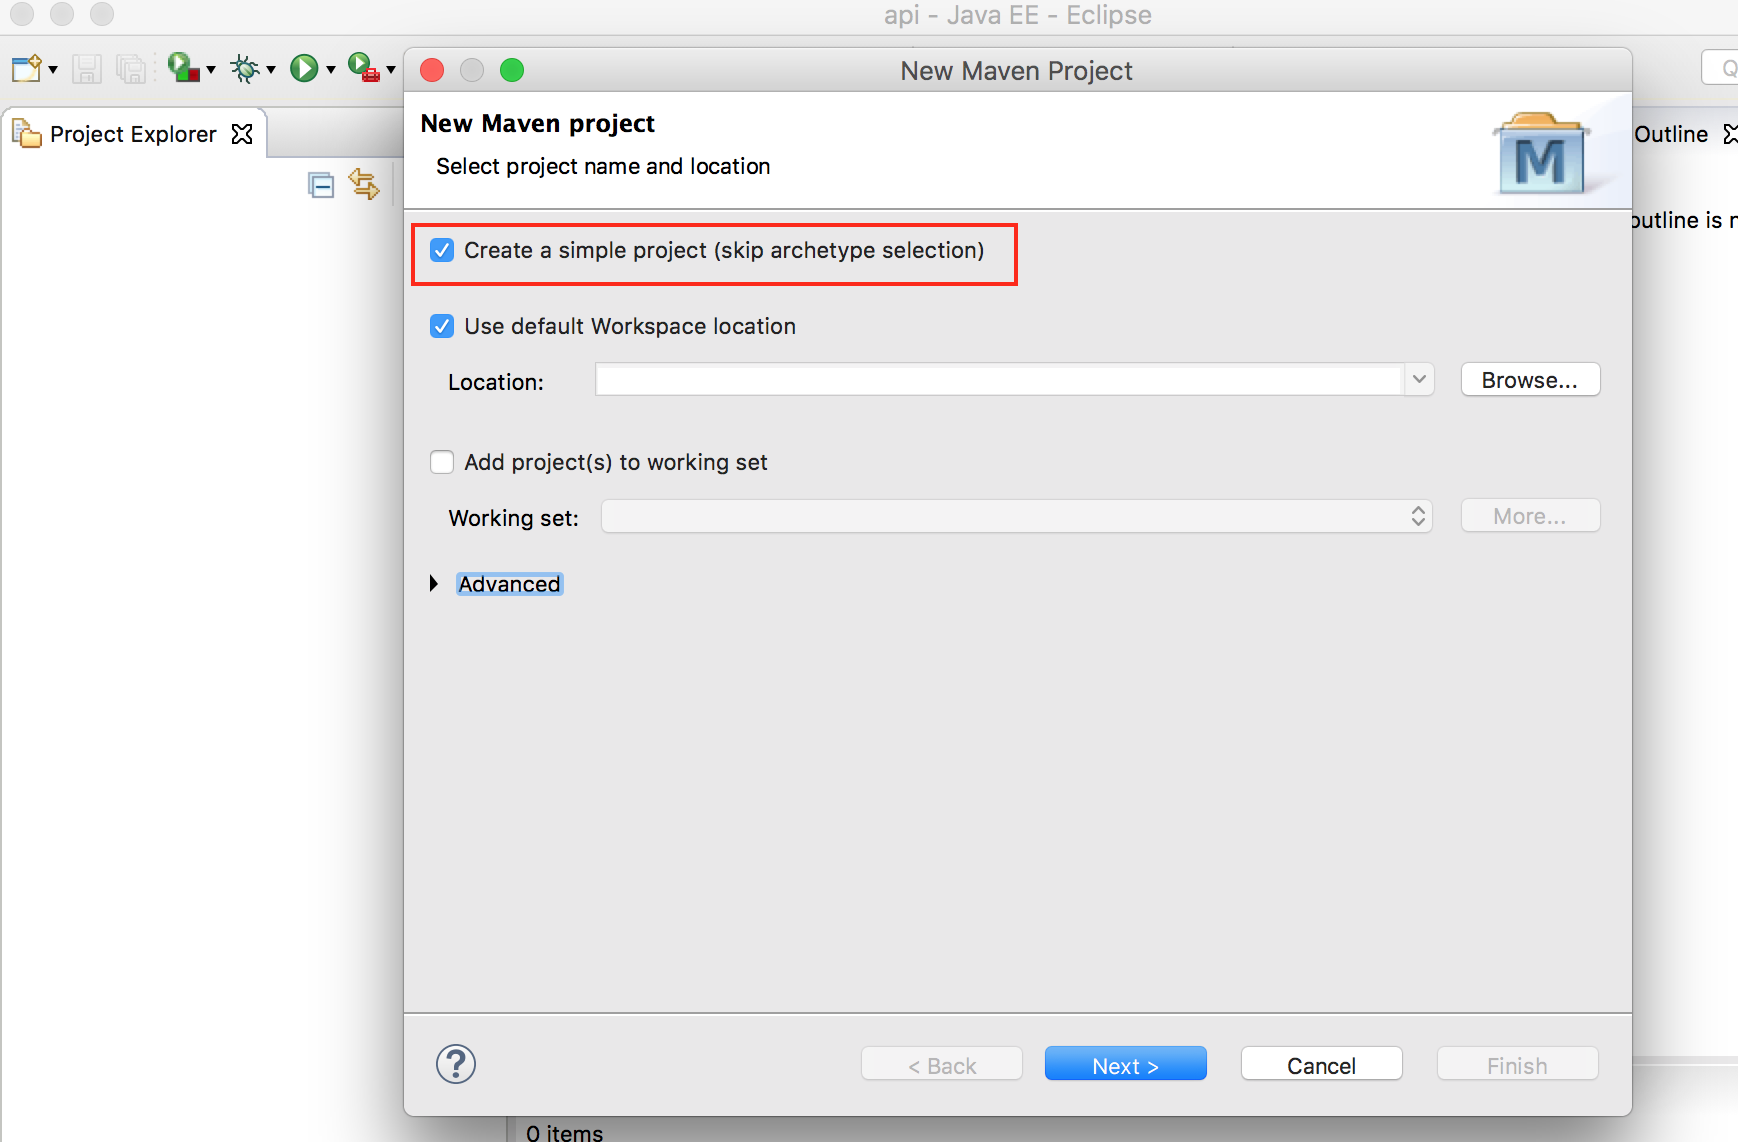
 2. Skip the archetype selection(we just need to create a simple maven project) and Click
 Next
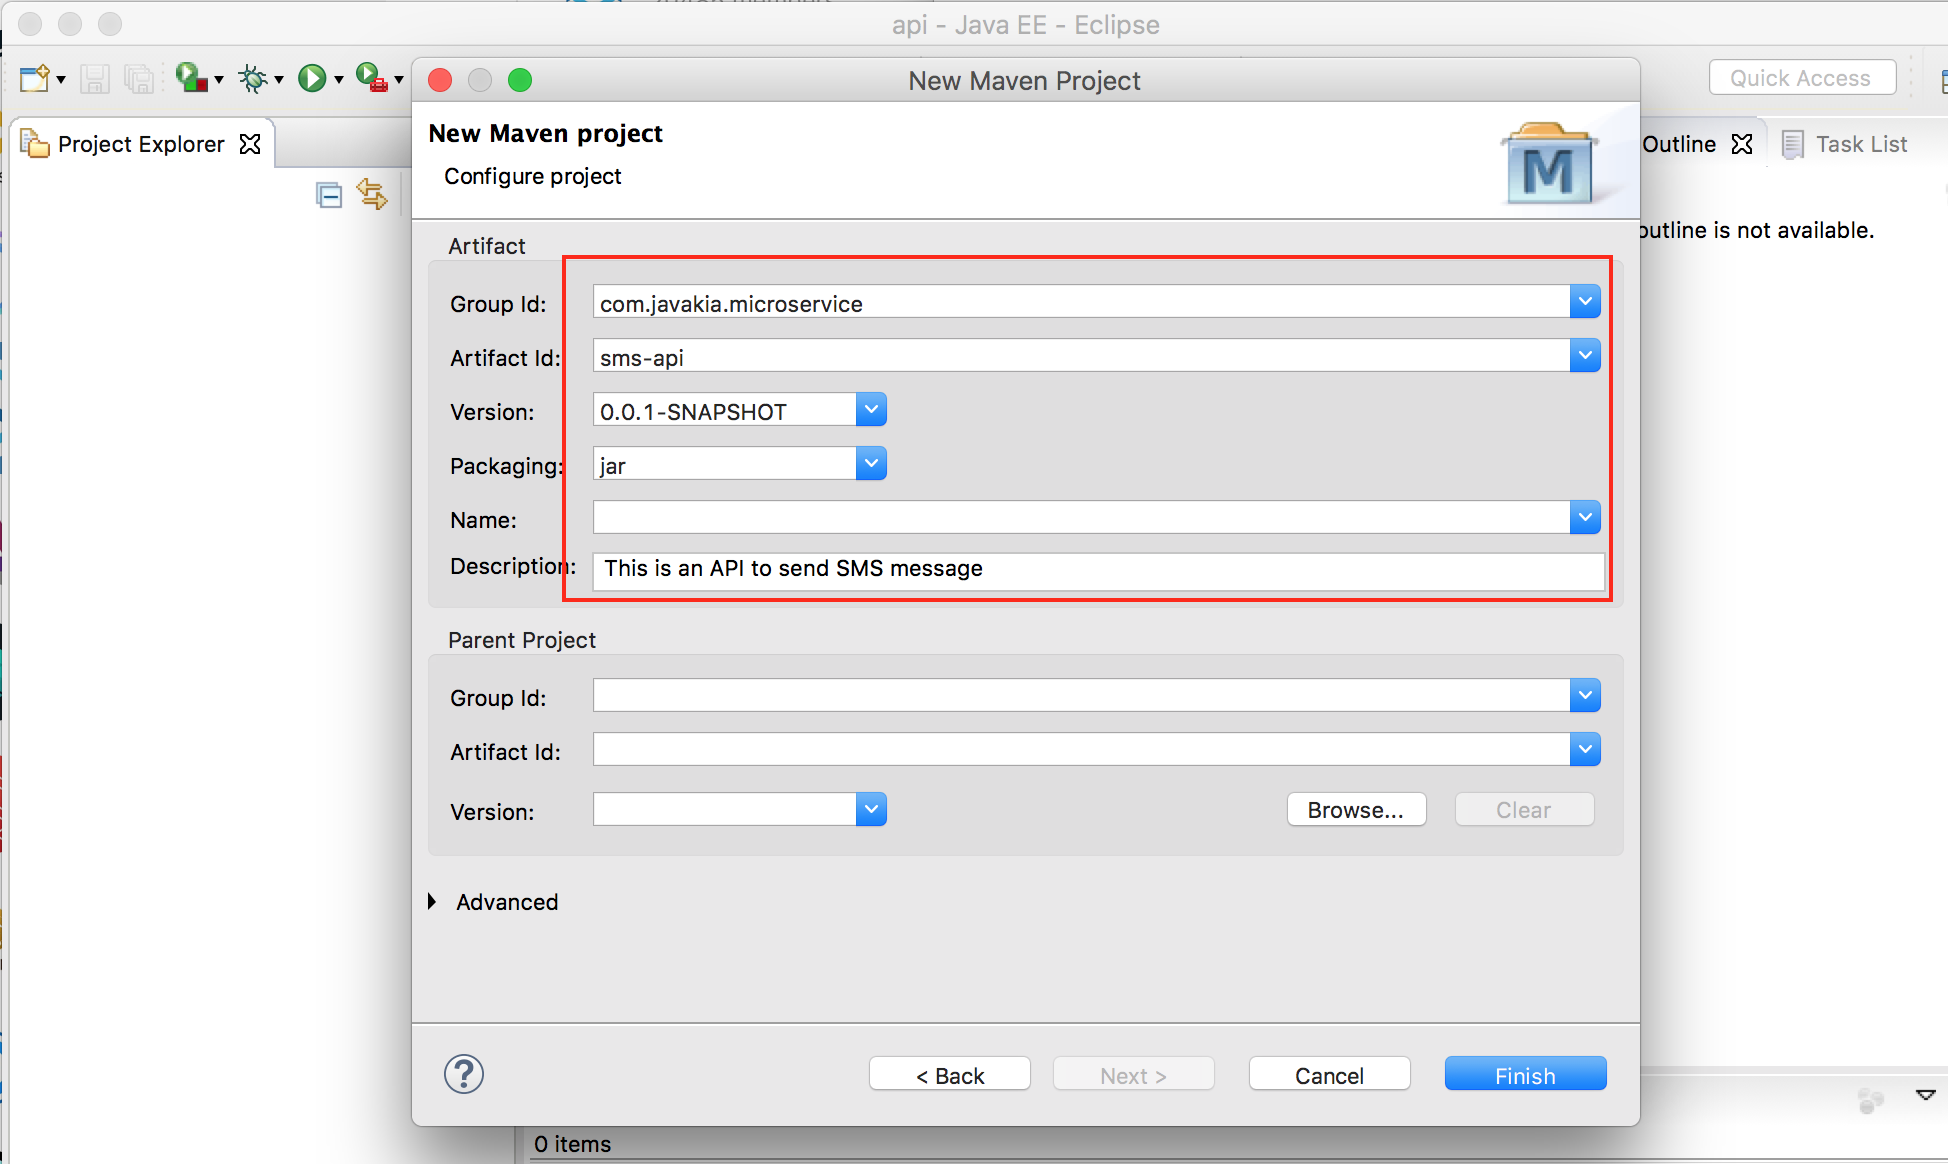
 3. Enter Group Id, Artifact Id and click
 Finish
 4. We have created a Maven Project. Now, let’s make it a Spring Boot project, we will do that by adding this parent project to the
 pom.xml file.
<parent>
	<groupId>org.springframework.boot</groupId>
	<artifactId>spring-boot-starter-parent</artifactId>
	<version>2.1.1.RELEASE</version>
</parent>
That is it, our app is now a Spring Boot Application. Adding this spring-boot-starter-parent project to the pom.xml is all we need to make our project a spring-boot project.
Next, we are going to add all the dependencies that our project needs. For instance, since our application is RESTful application, we need to add those Restful related dependencies. But, what dependencies our project needs to make it Restful? well, all we need is adding this dependency to our pom.xml. This starter dependency downloads all dependencies needed for building web, including RESTful, applications using Spring MVC. Uses Tomcat as the default embedded container.
	<dependency>
		<groupId>org.springframework.boot</groupId>
		<artifactId>spring-boot-starter-web</artifactId>
	</dependency>
Behind the scenes, this spring-boot-starter-web dependencency will add all these dependencies listed here pom.xml to our project.
You can verify if these jars are included to your application by running mvn dependency:tree from the command line(in the root directory of your project) or you can just expand Maven Dependencies folder from your eclipse.
Add the twilio Maven dependency to the pom.xml
<dependency>
    <groupId>com.twilio.sdk</groupId>
    <artifactId>twilio</artifactId>
    <version>7.20.0</version>
</dependency>
5. Since our app is a standalone, we need to have a class with the main method because any java standalone application needs to have one class with the main method to be used as an entry point of the application.
If you have used SPRING INITIALIZR to create your spring boot application this class will be created for you.
But, for now, let’s create the class SmsApplication.java and replace the content with this.
package com.javakia.microservice.api;

import org.springframework.boot.SpringApplication;
import org.springframework.boot.autoconfigure.SpringBootApplication;

@SpringBootApplication
public class SMSApplication {
	public static void main(String[] args) {
		SpringApplication.run(SMSApplication.class, args);
	}

}
At this point we have a complete spring boot application, but it does NOTHING.
So, let’s create our Controller class that will accept request to send SMS. Create SMSController.java and replace the content with this.
package com.javakia.microservice.api.message;

import org.springframework.beans.factory.annotation.Autowired;
import org.springframework.web.bind.annotation.RequestMapping;
import org.springframework.web.bind.annotation.RequestMethod;
import org.springframework.web.bind.annotation.RestController;

import com.javakia.microservice.api.service.SMSService;
import com.twilio.rest.api.v2010.account.Message;

@RestController
public class SMSController {

	@Autowired
	private SMSService smsService;

	@RequestMapping(value = "/sendSMS", method = RequestMethod.POST)
	public Message sendSMS() {
		return smsService.sendSMS();
	}

}
If you notice, we are injecting SMSService to our SMSController.java
    @Autowired
    private SMSService smsService;
Create SMSService.java interface class.
package com.javakia.microservice.api.service;

import com.twilio.rest.api.v2010.account.Message;

public interface SMSService {
	public Message sendSMS();

}
Next, let’s create SMSServiceTwilio.java, this is the class that will send the SMS message by calling the twilio API. Make sure that you have updated your AUTH_TOKEN, ACCOUNT_SID, Twilio phone number and the phone number you are sending SMS to.
package com.javakia.microservice.api.service;

import org.springframework.stereotype.Service;

import com.twilio.Twilio;
import com.twilio.rest.api.v2010.account.Message;
@Service
public class SMSServiceTwilio implements SMSService{
    // Find your Account Sid and Token at twilio.com/console
    public static final String ACCOUNT_SID = "XXXXXXXXXXXXXXXXXXXX";
    public static final String AUTH_TOKEN = "XXXXXXXXXXXXXXXXXXXX";

    @Override
    public Message sendSMS() {
        Twilio.init(ACCOUNT_SID, AUTH_TOKEN);
        Message message = Message.creator(
                new com.twilio.type.PhoneNumber("+XXXXXXXXXXX"),//The phone number you are sending text to
                new com.twilio.type.PhoneNumber("+XXXXXXXXXXX"),//The Twilio phone number
                "Teaching is The new learning")
           .create();

        return message;
    }
}
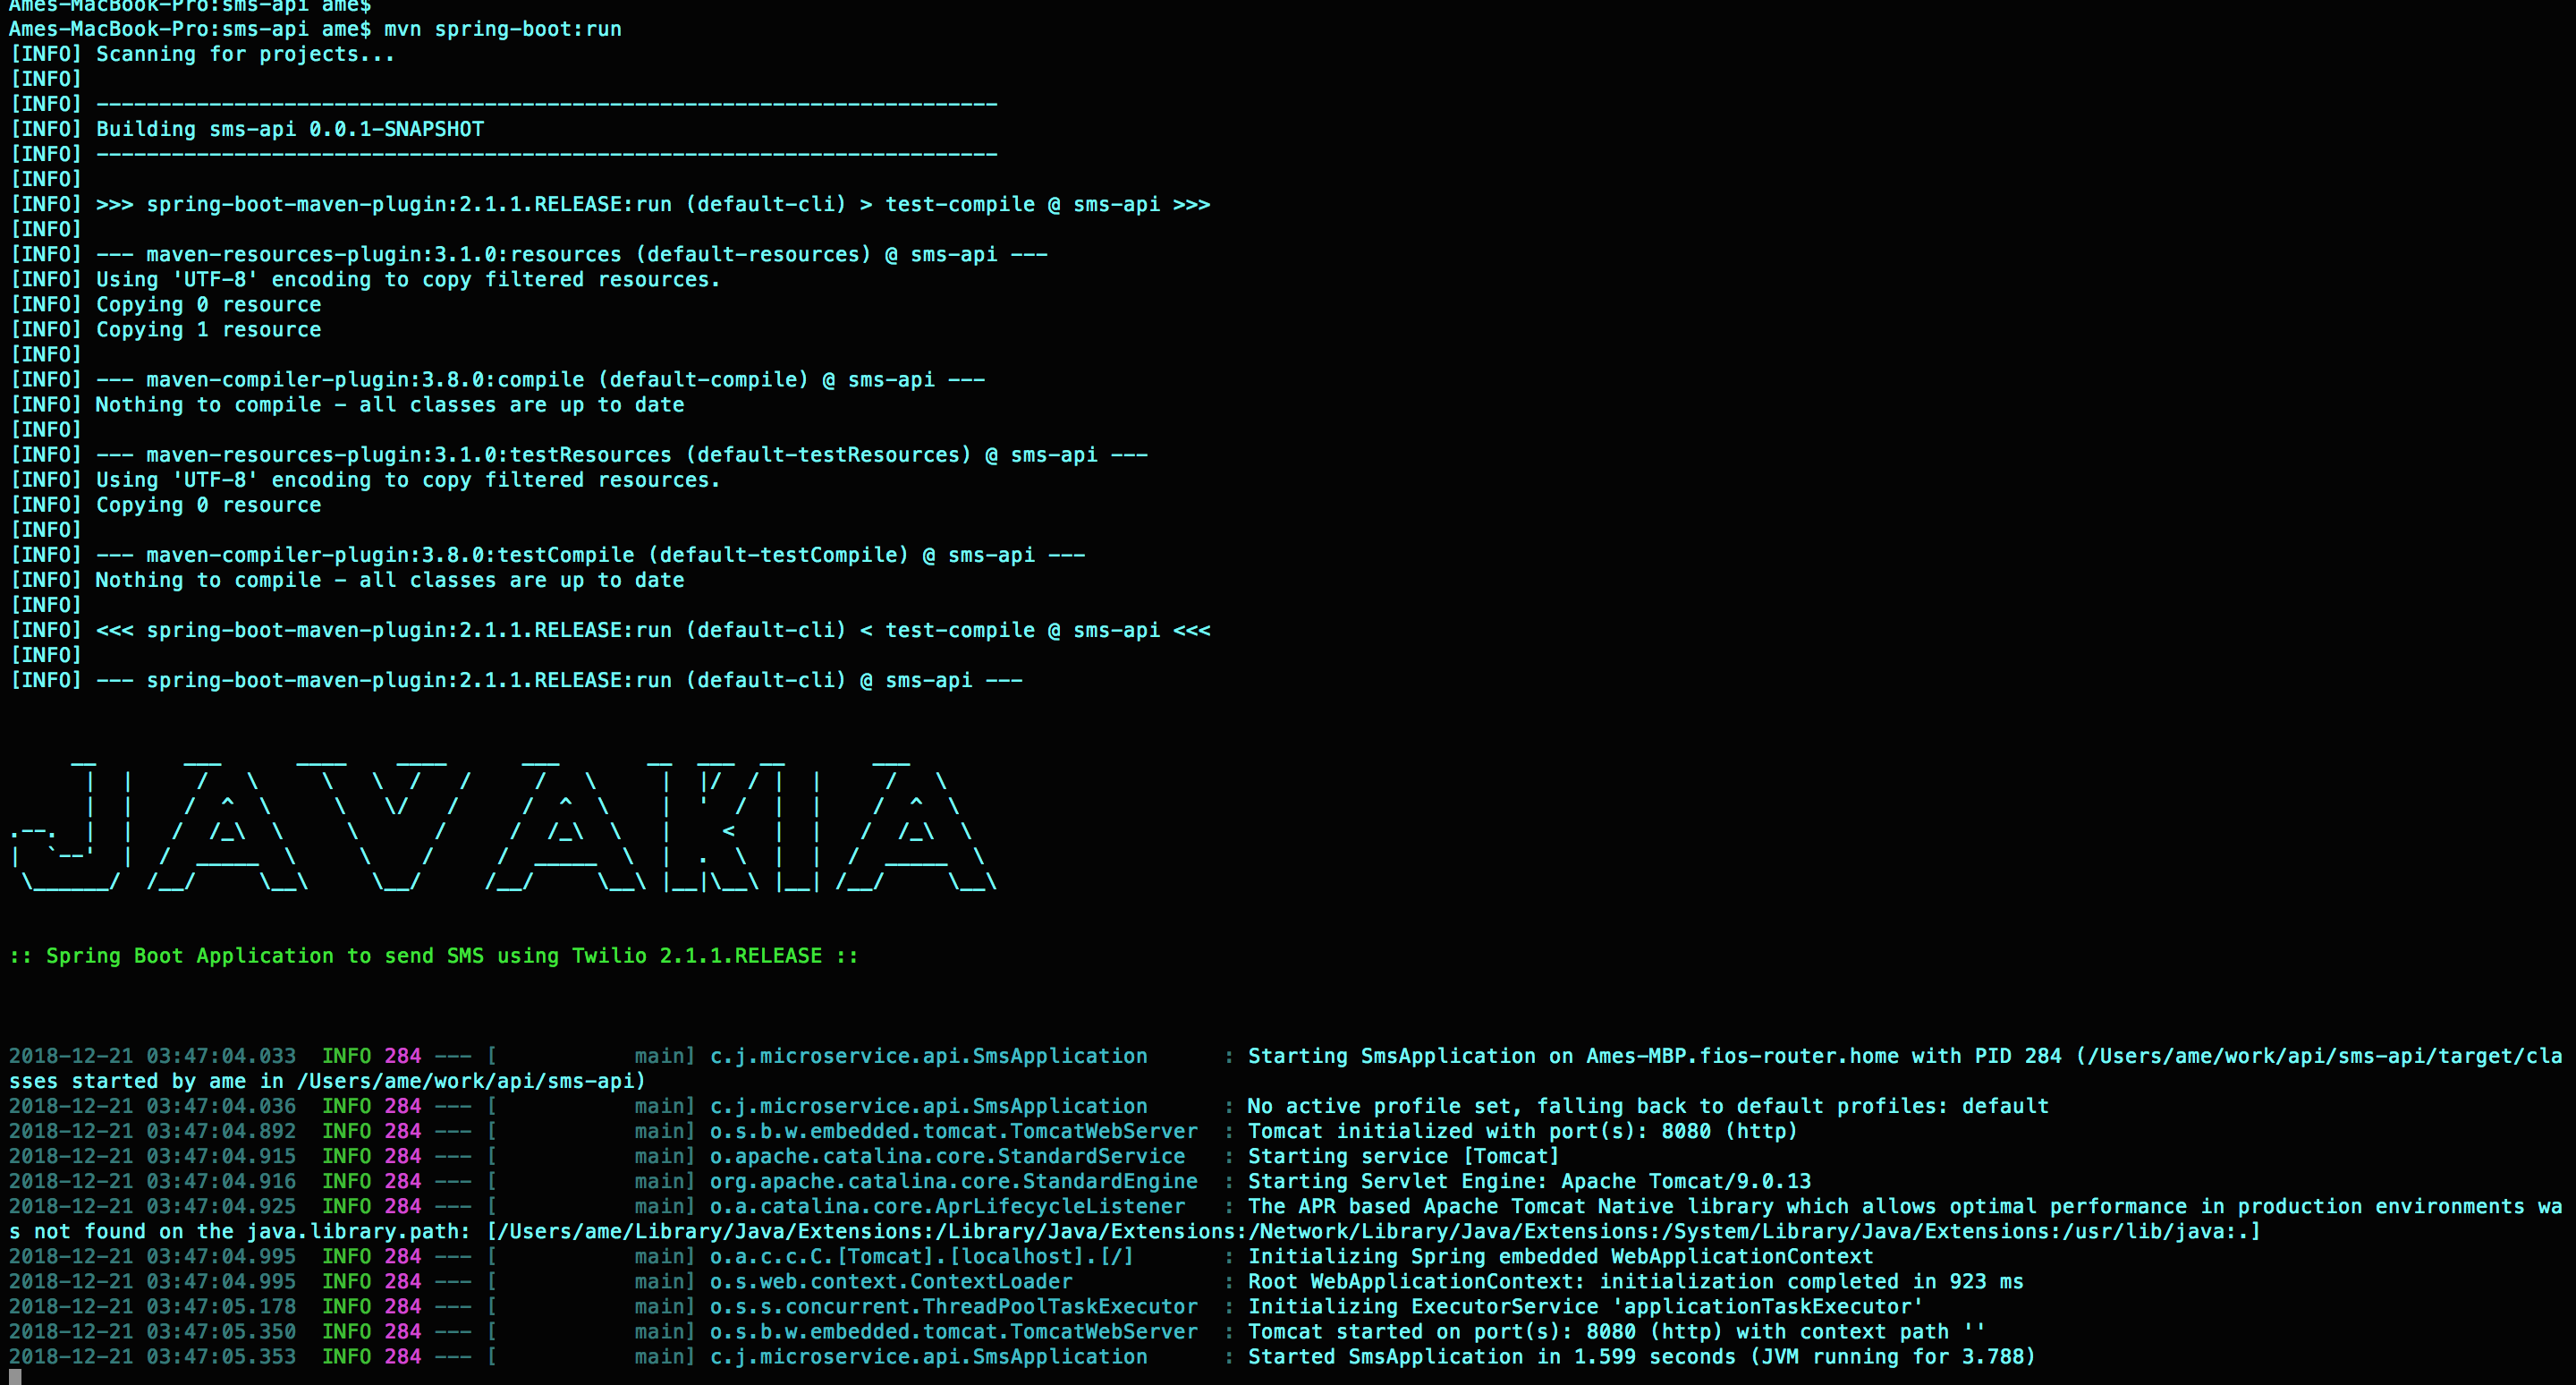
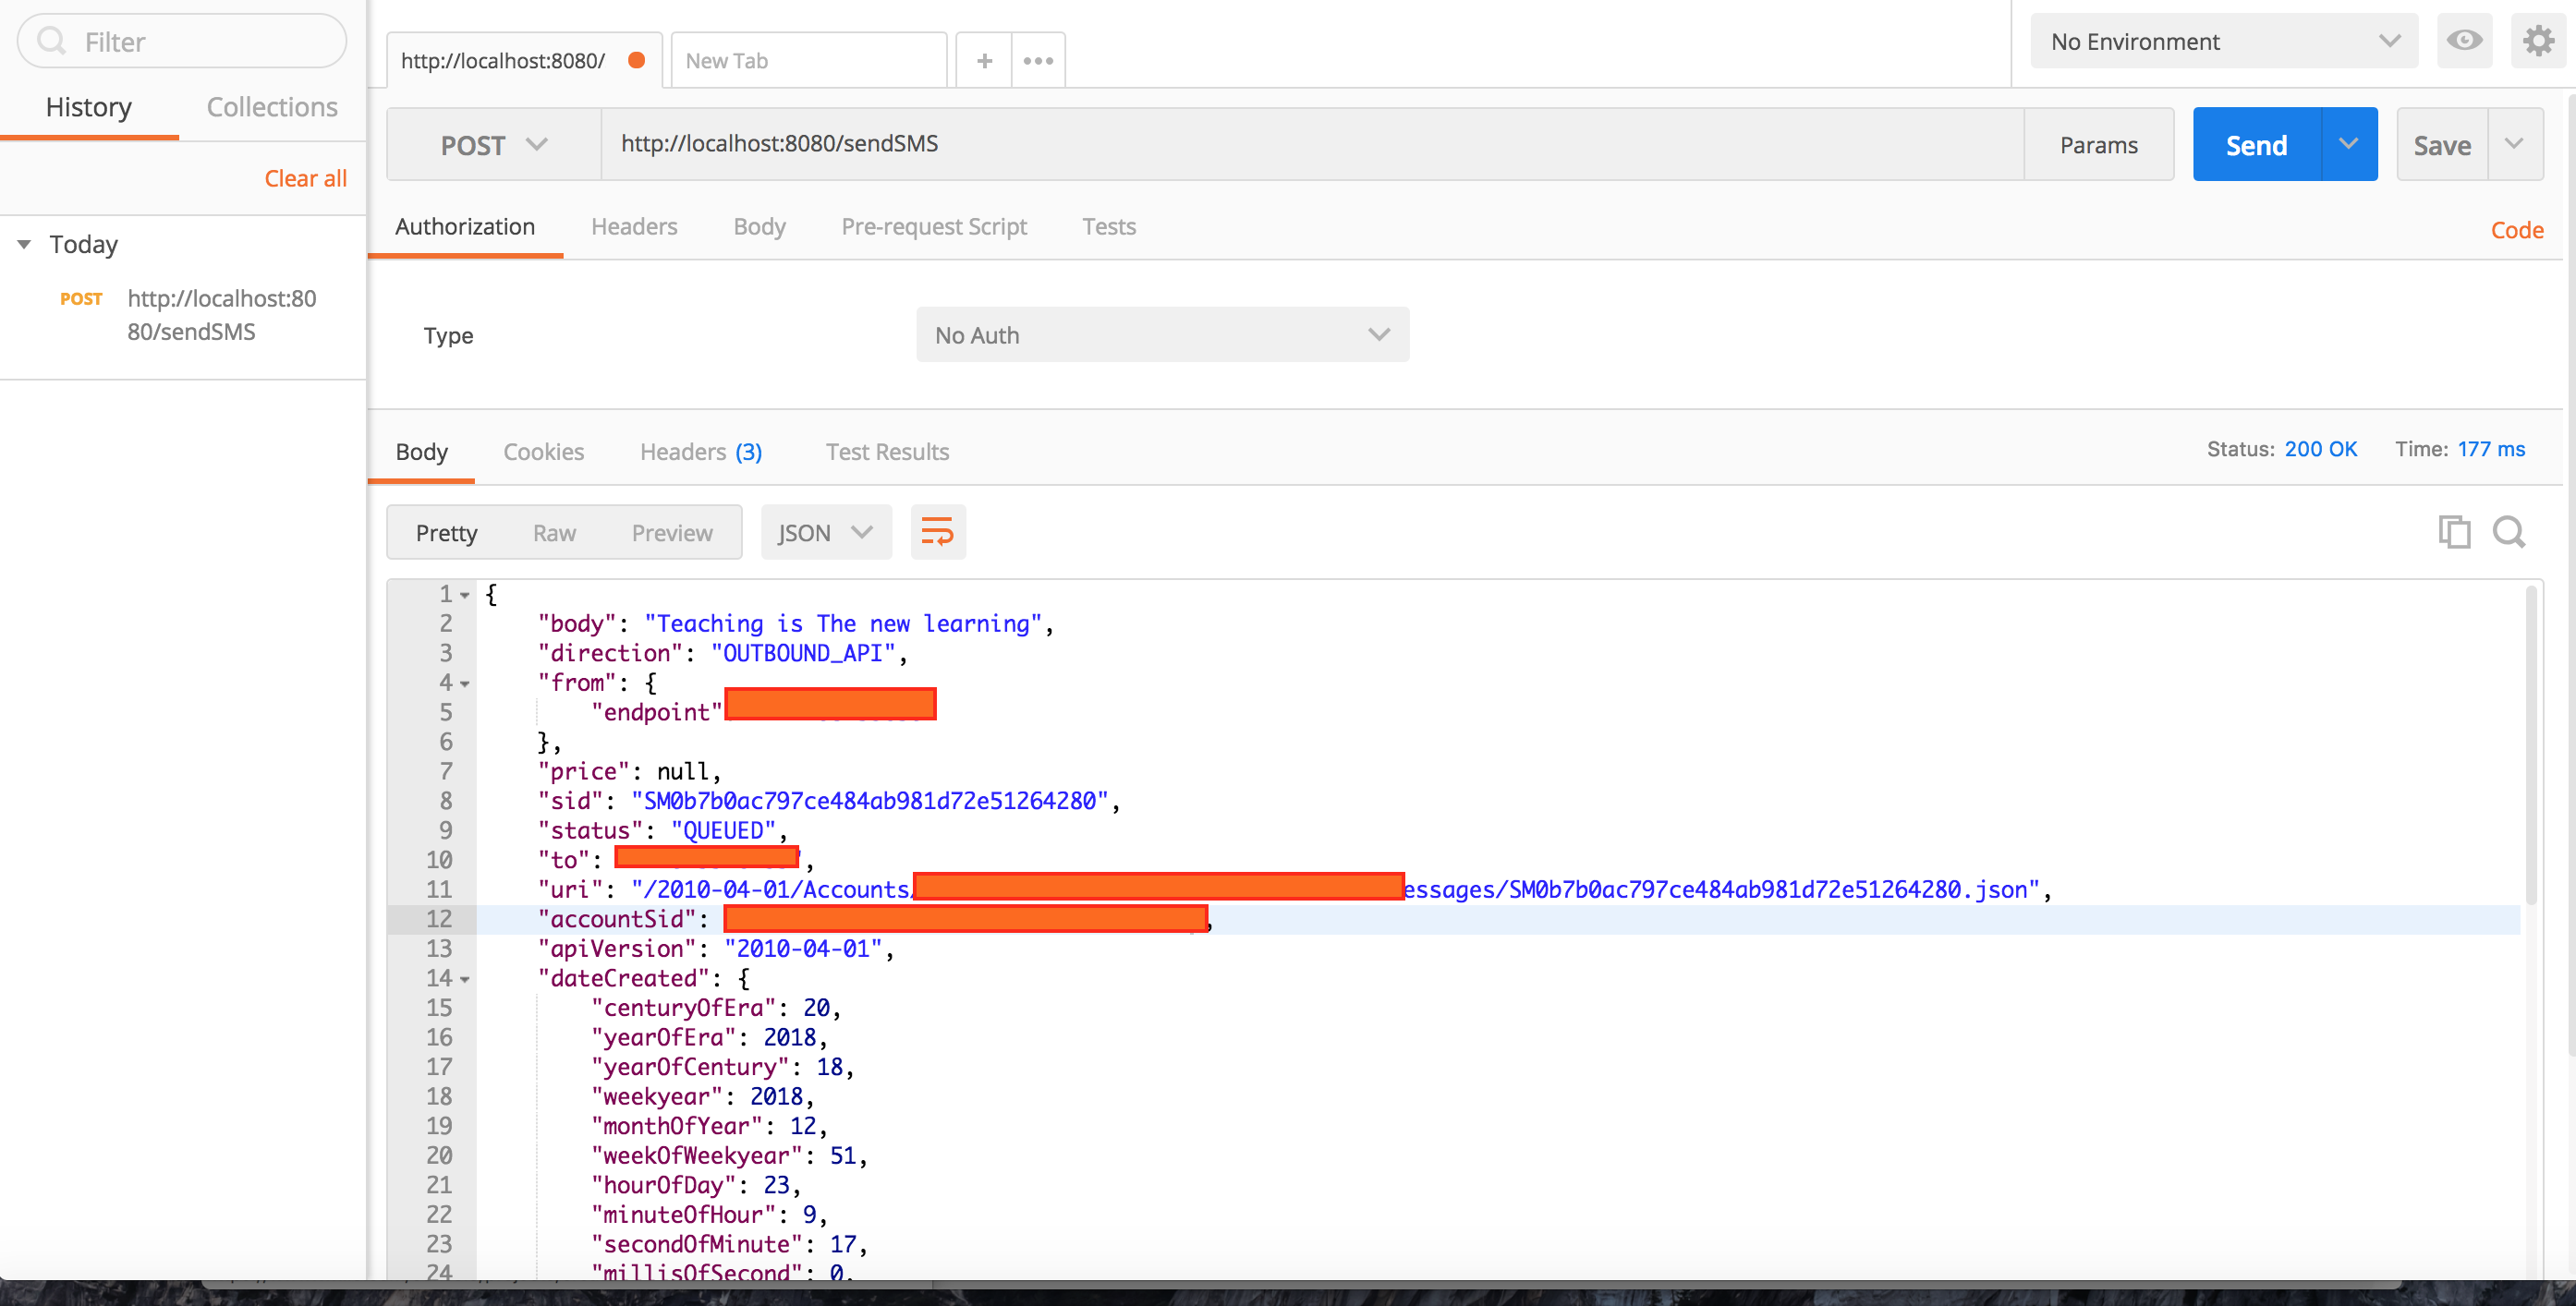
That is it. Our service is ready to send SMS and lets run and test it using postman.
Run our Spring boot app
From the terminal run mvn spring-boot:run(from the root directory of the project).
Or you can run the project from eclipse itself… Right Click–>Run As ->Java Application
Hit the [POST]http://localhost:8080/sendSMS endpoint from postman.
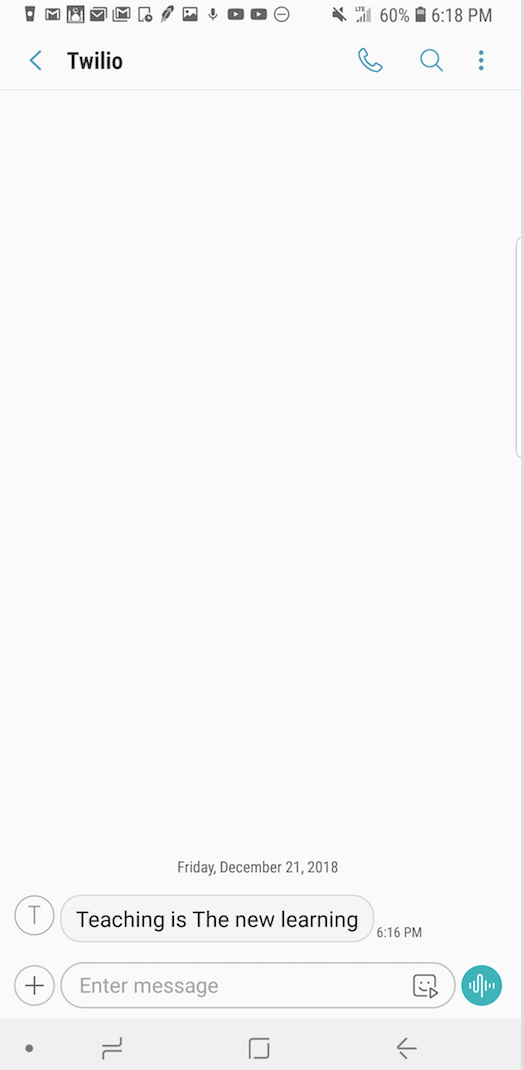
Succefully recieved the SMS on on my phone.
You can find the full source code on Github here
I hope this tutorial was helpful. Have questions or suggestions? Feel free to write a comment below. Thank you for reading!

Share this post
Twitter
Google+
Facebook
Reddit
LinkedIn
StumbleUpon
Pinterest
Email